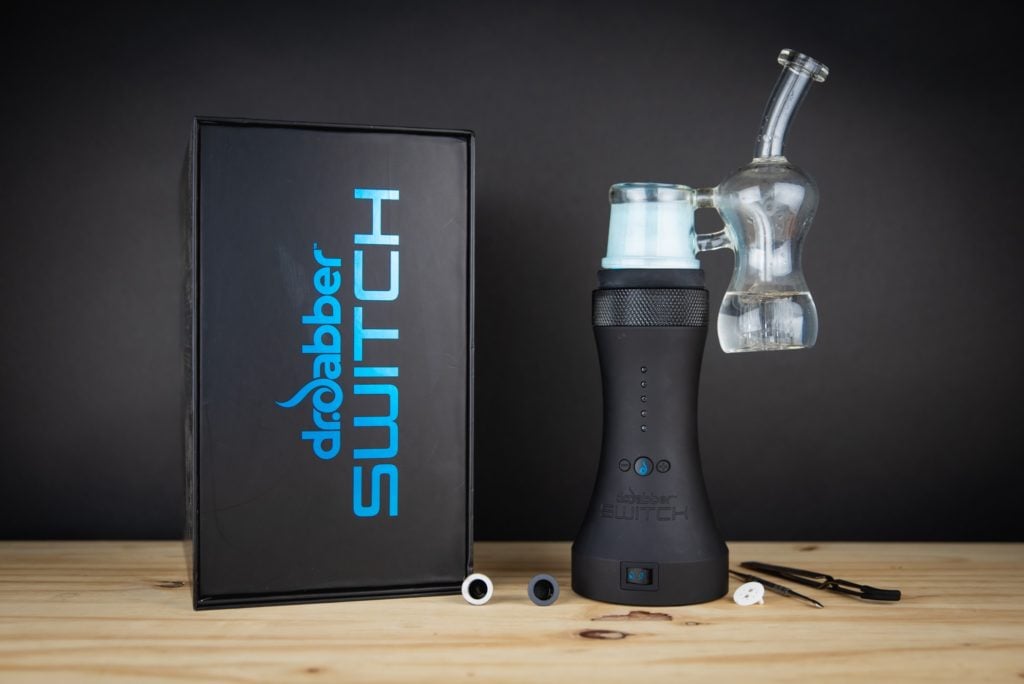
The DR Dabber Switch is a portable dab rig made by the company Dr. Dabber. The Switch is a 2-in-1 Oil and Loose-Leaf vaporizer that uses induction heating to vaporize your materials. It comes with induction cups, a detachable bubbler, and a carb cap and retails for $374.95.
Dr. Dabber also makes the newer Boost EVO which sacrifices battery life but adds portability and USB-C charging. I’ve also found it to be the second easiest dab rig to clean and maintain, the Switch taking first.
I have a full breakdown of the Boost EVO vs. Switch in my Dr. Dabber Boost Evo Review, and it literally includes everything you need to know about the Boost EVO dab rig. Hit me up in the comments with any questions.
The Dr. Dabber Switch retails for $375, and you can click here to pick it up directly from Dr. Dabber. Save an extra 15% with coupon code VAPEWIZ15. Remove free items from the cart for the discount. The code doesn’t work if the item has already been discounted. Read on below for my full Dr. Dabber Switch review.
Table of Contents
- 1 A Dr. Dabber Original
- 2 Build Quality and Design – One Tough Switch
- 3 Switch Premium Induction Cups
- 4 Switch it up! Oil and Loose-Leaf (Dry Herb)
- 5 How To Use the DR DABBER Switch
- 6 The SWITCH Heating and Temp Options
- 7 Flavor, Taste, Vapor Density
- 8 Switch Battery Specs and Charge Times
- 9 How Portable is the Dr. Dabber Switch?
- 10 Cleaning the DR. Dabber Switch
- 11 Switch Dab Rig Warranty Info
- 12 Make The Switch. You Won’t Be Disappointed
A Dr. Dabber Original
I was a little skeptical about testing out the Switch, to say the least. Dr. Dabber is not necessarily known for originality or quality over the years, but I have to say that I am extremely impressed by the functionality and overall design of the Switch dab rig.
It features fast heat-up times, a full range of temp options, and great battery life, and the flavor the Switch produces is honestly some of the best I have tested out of a portable dab rig.
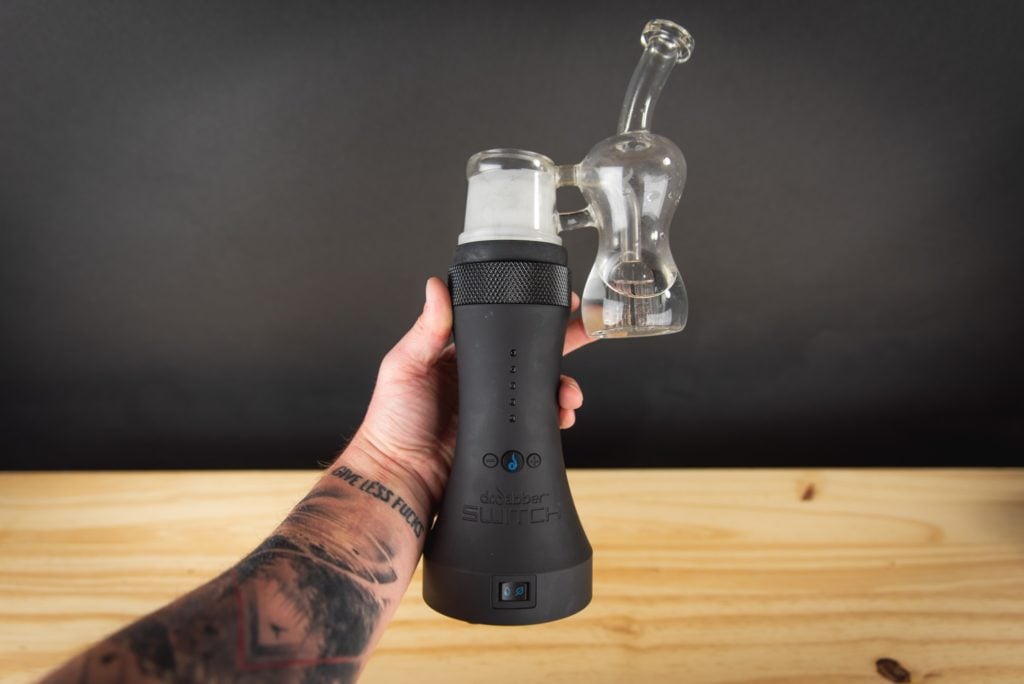
My first impression of the Switch was, “wow, this thing is HUGE,” but after digging into the manual, setting everything up, and hitting it for the first time, it changed to “wow, this thing is amazing.”
In this Dr. Dabber Switch review, I’ll go over the different flower and oil modes, the induction cups, loading techniques, temp settings, cleaning, and where to buy. But before we get too far into this review, I think it’s important to note that the Switch is NOT the best vaporizer for dry herbs. In fact, I don’t use it AT ALL for dry herbs. I use it explicitly for oils and concentrates.
If you wanted something stationary for both dry herbs and concentrates, check out my best desktop vaporizer article and scroll down to the Ditanium. So with that said, let’s jump into my full DR DABBER Switch dab rig review.
Build Quality and Design – One Tough Switch
Overall, the Switch is built extremely well and is one of the most sturdy/durable vaporizers that I have tested. The size alone makes it easy to handle and pass around, especially in group scenarios.
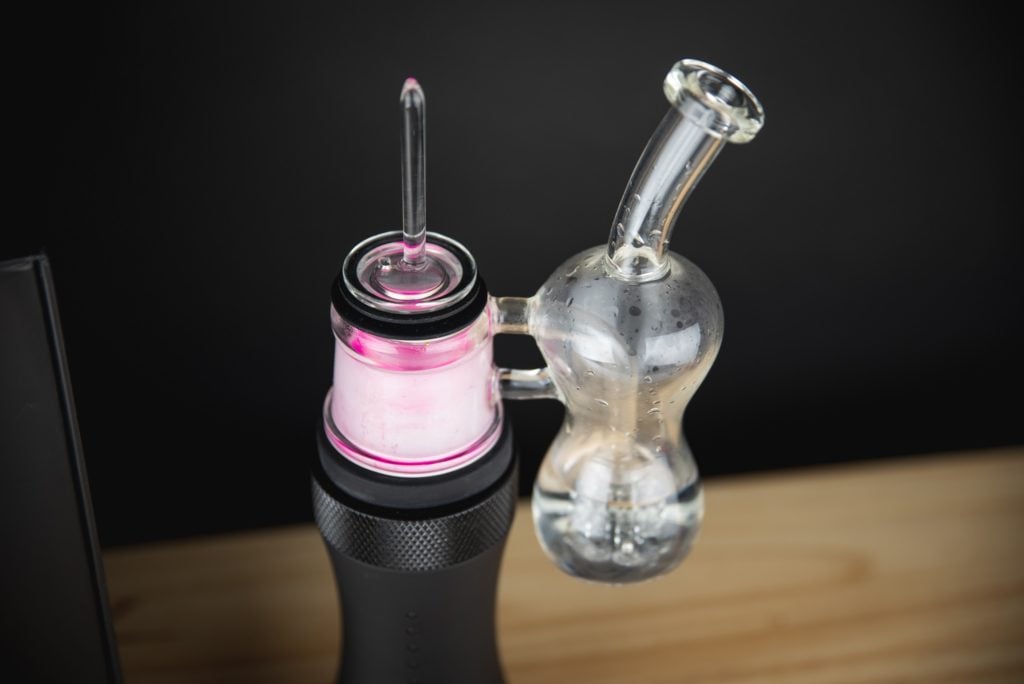
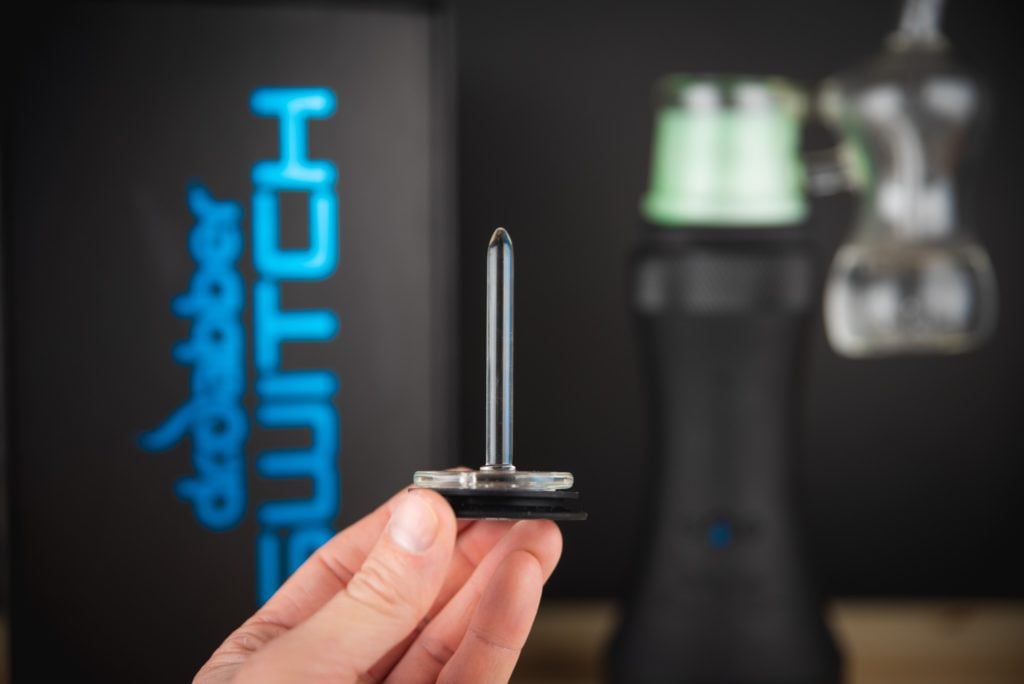
The one thing I will say to be careful with is the carb cab with stir tool. I dropped the carb cap once on a wooden table, and the glass stir tool broke from the base of the cap. It’s not a huge deal, and I’ll get another one but just be careful with the glass pieces.
Design-wise, the Switch is very simple and straightforward. You have an option selector for oils or loose-leaf, up and down temp settings, and a go button. There’s not much else to it until you start jumping into the Advanced temp mode, which I’ll get more into later on in this Switch review.
Switch Premium Induction Cups
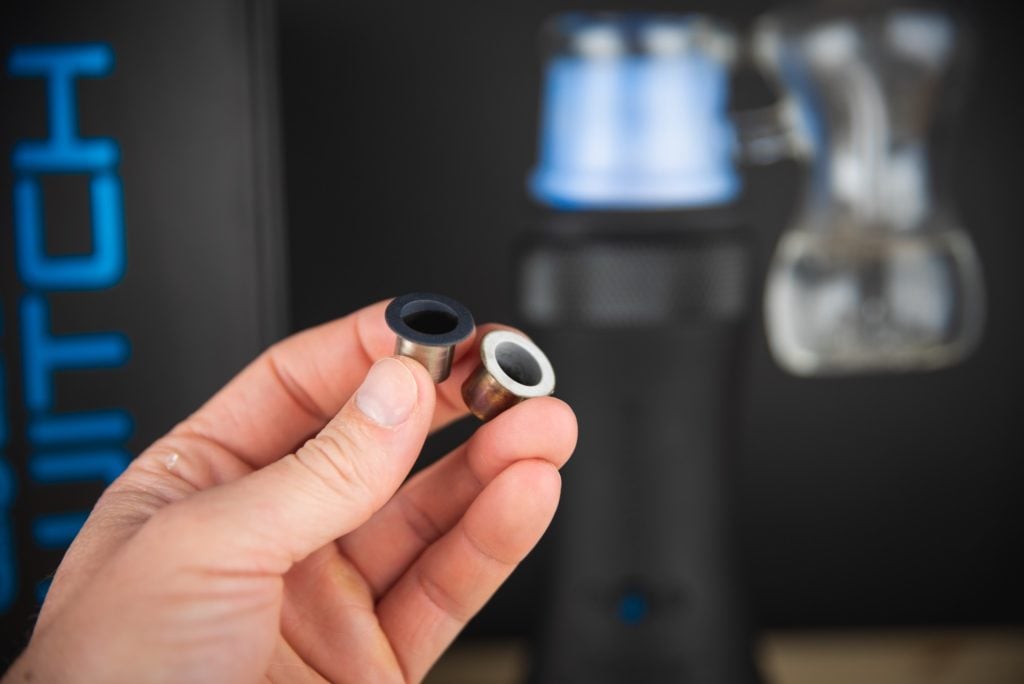
The Switch comes with two induction cups and a ceramic cover for dry herbs. The two precision induction cups that you get with the kit are White Ceramic and Black Ceramic. Dr. Dabber recommends using the White Ceramic for oils and the Black Ceramic for dry herb/loose-leaf, but they are both identical and can be used interchangeably.
Dr. Dabber also sells a lot of different kinds of induction cups. Last I checked, they have Titanium, Quartz, Smooth Ceramic, Sapphire, and SiC. I have all of these on order and will report back/update this review when I have tested them thoroughly. I think I’m most looking forward to the Quartz cup. If anyone has any experience with premium cups, please leave a comment below with your experiences and which one you like the best.
Switch it up! Oil and Loose-Leaf (Dry Herb)
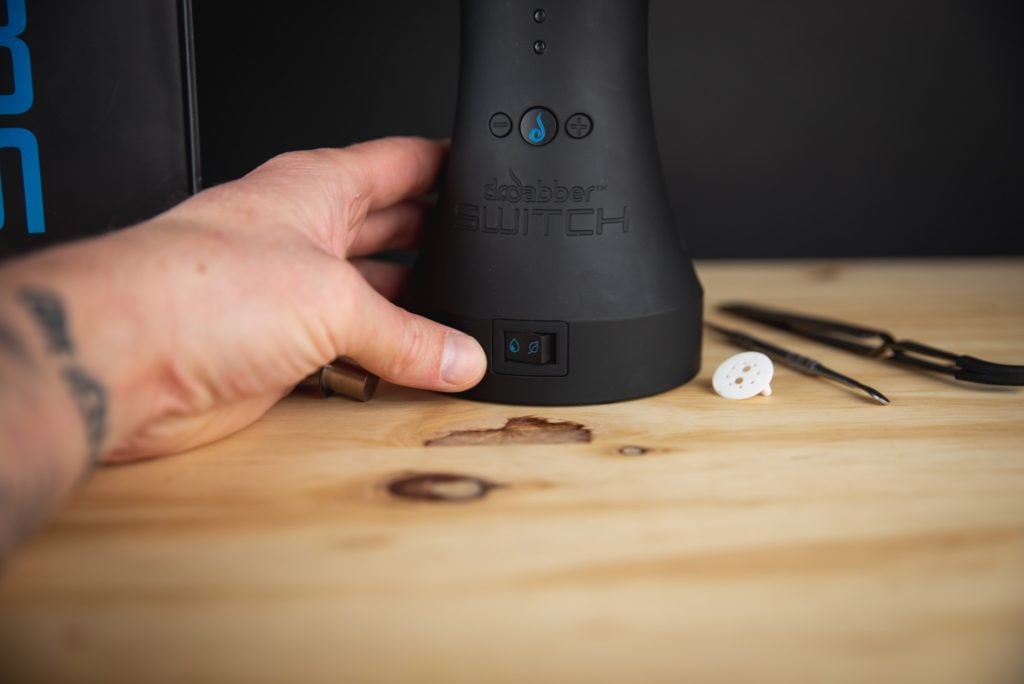
I personally only use the Switch on Oil mode because the dry herb mode is lackluster. I would not buy the Switch with the intention of vaping dry herbs. Yes, it works, but it is not pleasant.
How To Use the DR DABBER Switch
First use: The first thing I like to do when getting a new vaporizer or any device that uses an internal battery is fully charge it. I also like to wipe everything down with some Isopropyl Alcohol prior to first use. You will next fill the percolator with water, and we’re ready to turn it on.
Selecting Temp: Select Oil or loose-leaf mode.
After the device is turned on and ready to go, you can select your temp by using the plus and minus buttons on the front of the Switch. The lower temps will produce the best flavor, while the higher temps will produce denser vapor. There are five basic settings for oil and dry herb, with more advanced temp settings available. I’ll get more into the advanced temps later in this Switch review, but I prefer temp 4 for flavor and temp 5 to clear a dab in one 20-second session.
Loading your Switch: From here, you will load your materials into the induction cup. I prefer to use the White Ceramic Induction cup for oils and the black for loose leaf, but they are interchangeable. Remember to start with a small amount and work your way up.
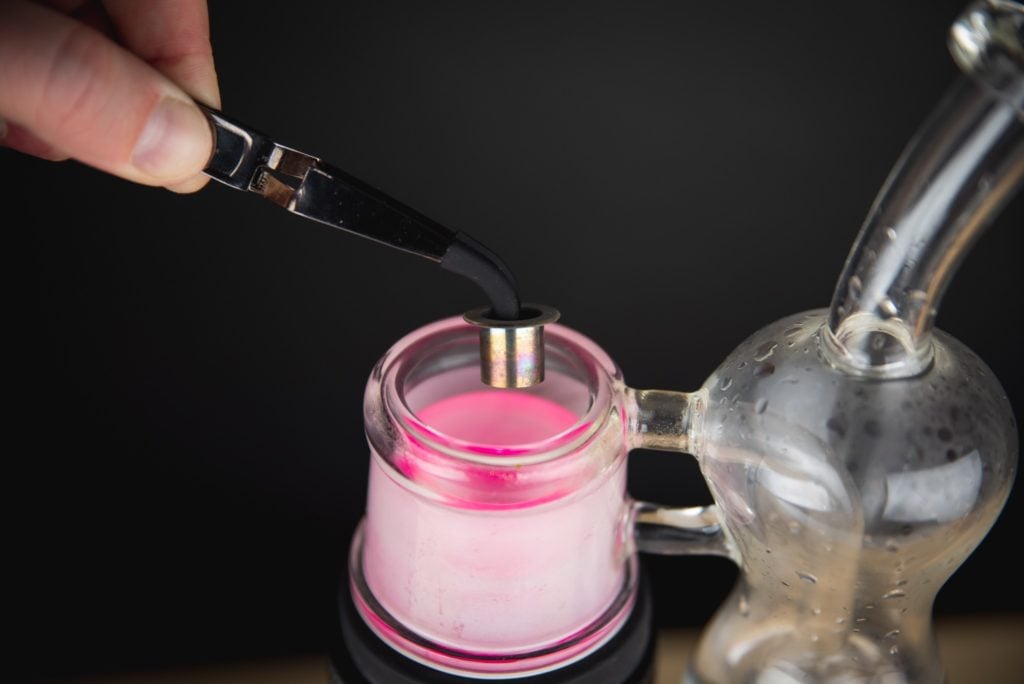
You can drop the cup into the chamber and then load your materials, but I’ve found that it is easier to load it before dropping the cup. Not quite as messy. I also like to place the carb cap on the top of the chamber prior to heating.
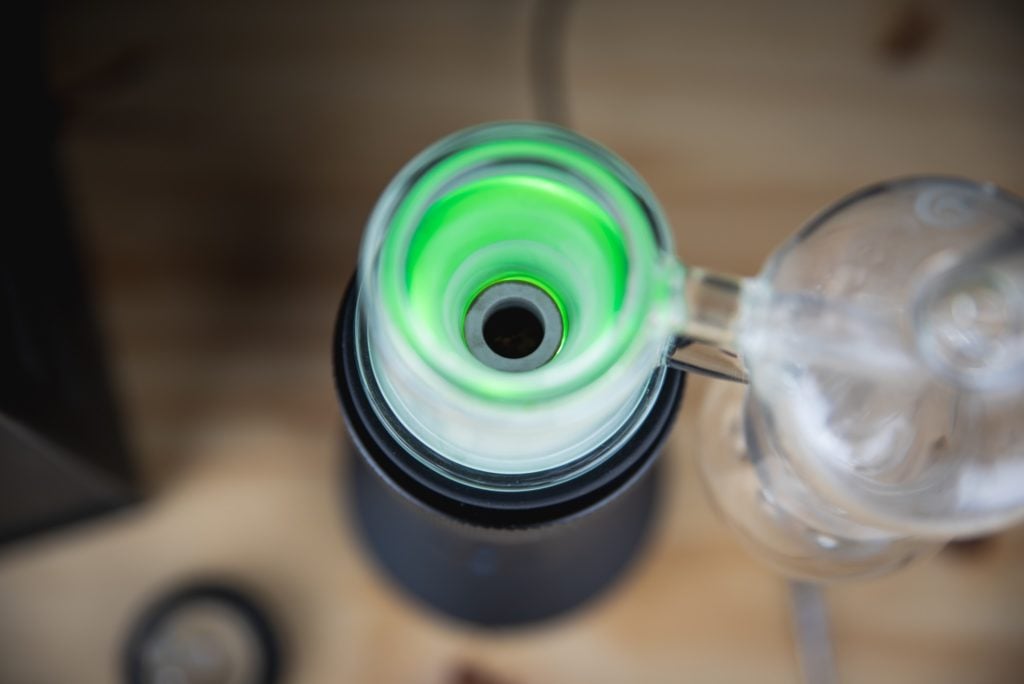
Next, press the middle “go” button with a blue dr dabber logo. The lights on the front will start to blink red, and when the top glows green, you are good to rip it. I like to start drawing from it a couple of seconds before it goes green and try to get through the entire 20-second session.
The Switch will auto-turn off based on the set timer. The default is 20 seconds. I’m usually destroyed at this point and don’t need another dab but if you were trying to pass it off to a friend, make sure the induction cup has completely cooled down before pulling it out with the reverse tweezers.
You can also load more material into the cup while it is in the chamber and run back-to-back sessions.
The Switch does have a built-in protection feature that prevents it from overheating. The front LEDs will blink Blue if the unit is too hot.
The SWITCH Heating and Temp Options
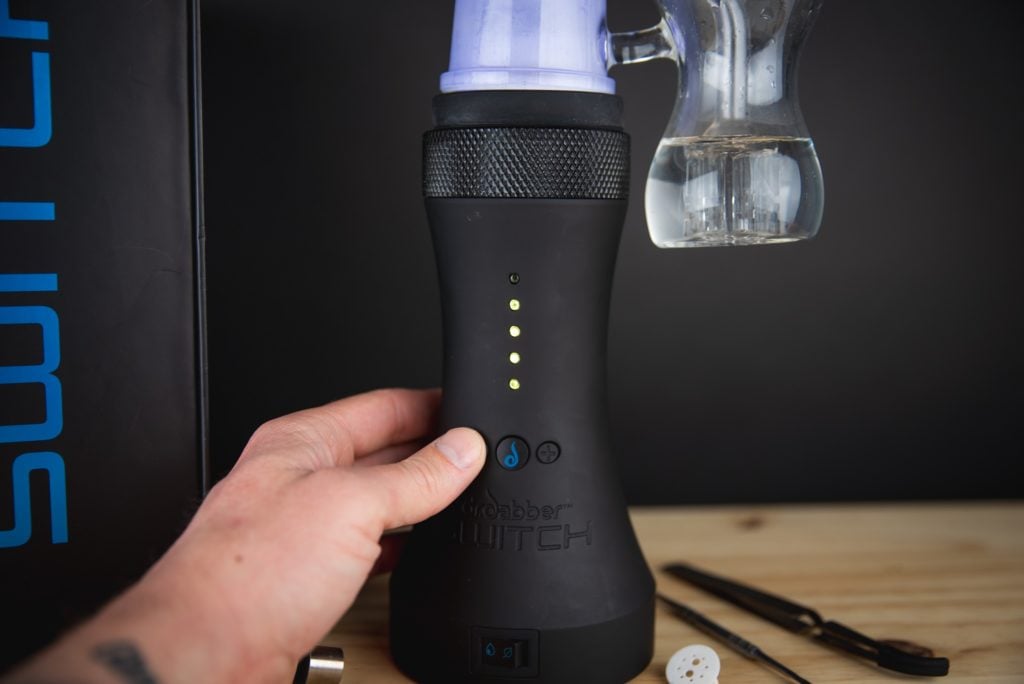
One of the features I like most about the Switch dab rig is the heat-up time. I have found that it takes about 5-7 seconds to heat up, depending on what temp you select, and the induction cups cool down pretty quickly after a session.
At first glance, the Switch offers five temp settings for both oil and flower, but after diving into the instruction manual, you’ll find that it offers an “Advanced Mode” featuring 25 different temp settings ranging from 300 – 780 (20-degree intervals).
There are only five temp settings for the leaf/dry herb mode still, but you get a lot of options for the concentrate/oil mode.
Flavor, Taste, Vapor Density
The first rips out of the Switch were amazing. The taste was great, the vapor was cool, and super dense vapor. I started off at temp 3 for the first couple of rips which is the ultimate taste temp. I then moved up to temp four which put out a lot more vapor, and then on to temp five, which absolutely crushed me. I was literally drooling.
For the most part, when I’m dabbing, I’m trying to get medicated, if you know what I mean. I can honestly say that the Switch on temp 5 is the cleanest, hardest-hitting dab rig that I’ve tested.
Switch Battery Specs and Charge Times
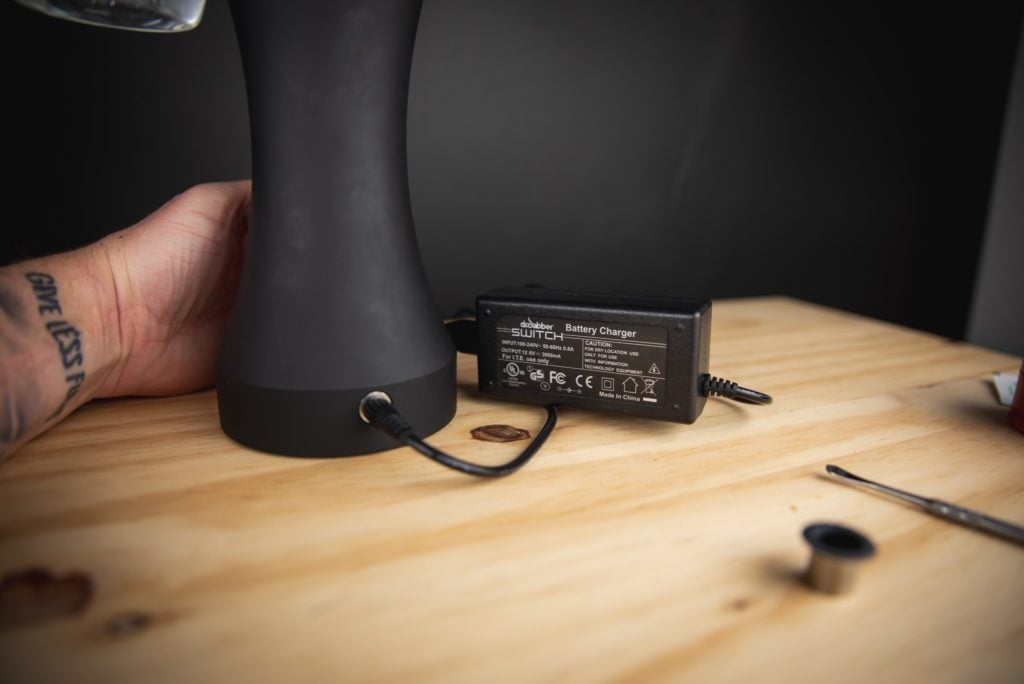
The Switch uses an internal, replaceable LiFeP04 non-volatile battery to power the device. The power output is up to 120 watts and features pass-through charging, which means you can use it while charging. The main thing I like about the Switch is how safe it is to use. The software features over-voltage, over-current, under-voltage, over-temp, short-circuit, and reverse polarity protection.
Average Battery Life – Dr. Dabber claims that the switch will vaporize 150 dabs on a single charge which is not even close to what I have found. I was averaging about 50 full-temp dabs during testing before the battery died on me. Do not get me wrong, this still has excellent battery life, and I’m not complaining by any means, but it’s not going to last you 150 dabs on a single charge. I’m also dabbing on the highest temp settings for the full duration each time and running a cleaning cycle after about ten dabs.
So maybe if you put the Switch on the lowest temp setting and didn’t run any cleaning cycles, you could possibly get 150 dabs out of it, but I don’t have the patience for that.
Charging Times – The good news is that the Switch will completely charge from dead in about 60 minutes. The Switch charges via a wall outlet and does offer a replaceable battery if you want to pick up an extra for use on the go, but it’s going to set you back $75 the last time I checked.
Check Battery Level – The battery level is indicated after selecting a temp setting and is displayed via PINK LEDs on the front of the vaporizer. If the lights are flashing PINK, the battery level is less than 10% and needs to be plugged in.
How Portable is the Dr. Dabber Switch?
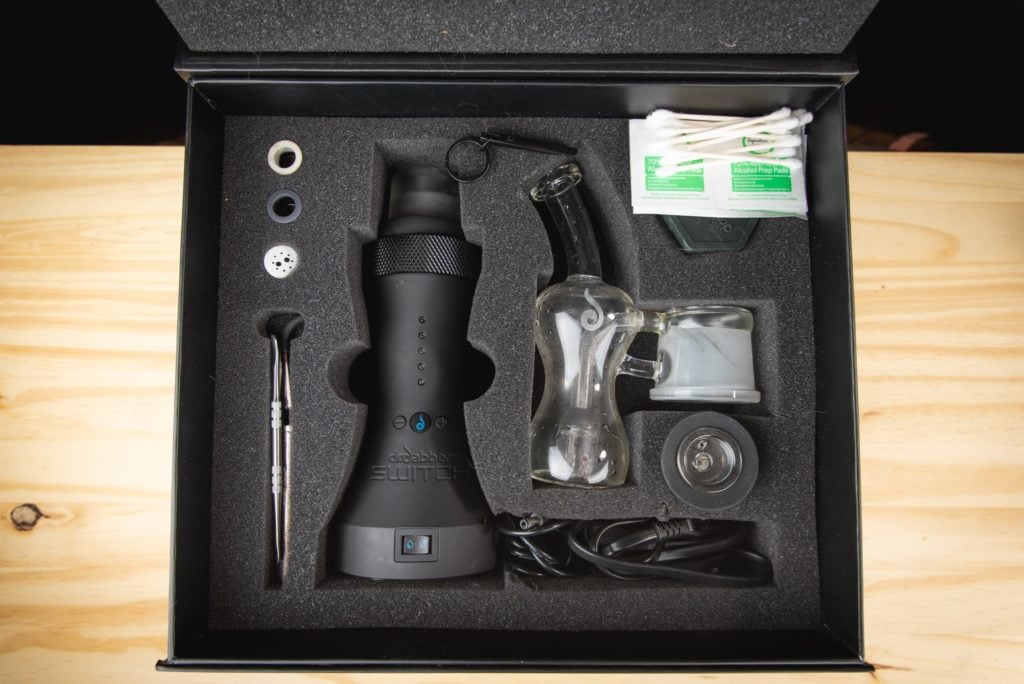
The Switch is technically a portable dab rig, but you can see that this is definitely bigger than your average vaporizer. This thing is huge! The one plus to it being this big is that it never falls over, and you will never misplace it!
More seriously, the DR Dabber Switch can be used on the go if you absolutely want to, and it has great battery life, but it is just too big for my taste. I would not be bringing this on a hike with me, biking, or even to a concert. I would bring something like the RIO Dab Rig instead. Something easier to carry around and can fit in a backpack or purse.
The case that the Dabber SWITCH comes with is actually a fairly good storage and carrying system. It all loads back into it nicely, and the case has an included handle on the top.
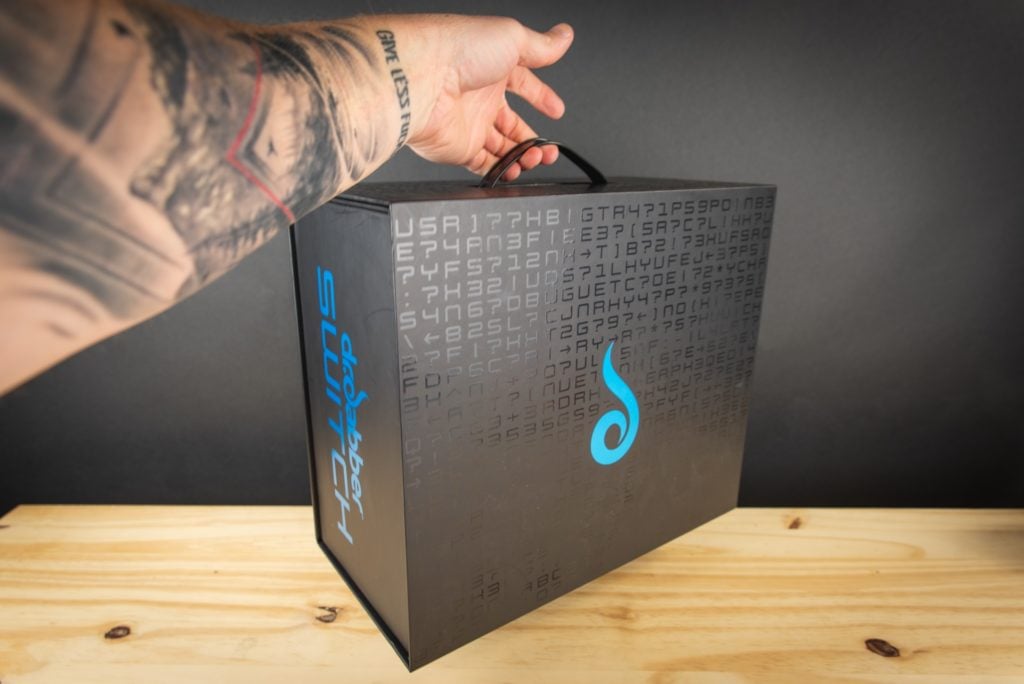
I have taken it over to a friend’s house here and there, but that’s the only time the SWITCH leaves my house.
Cleaning the DR. Dabber Switch
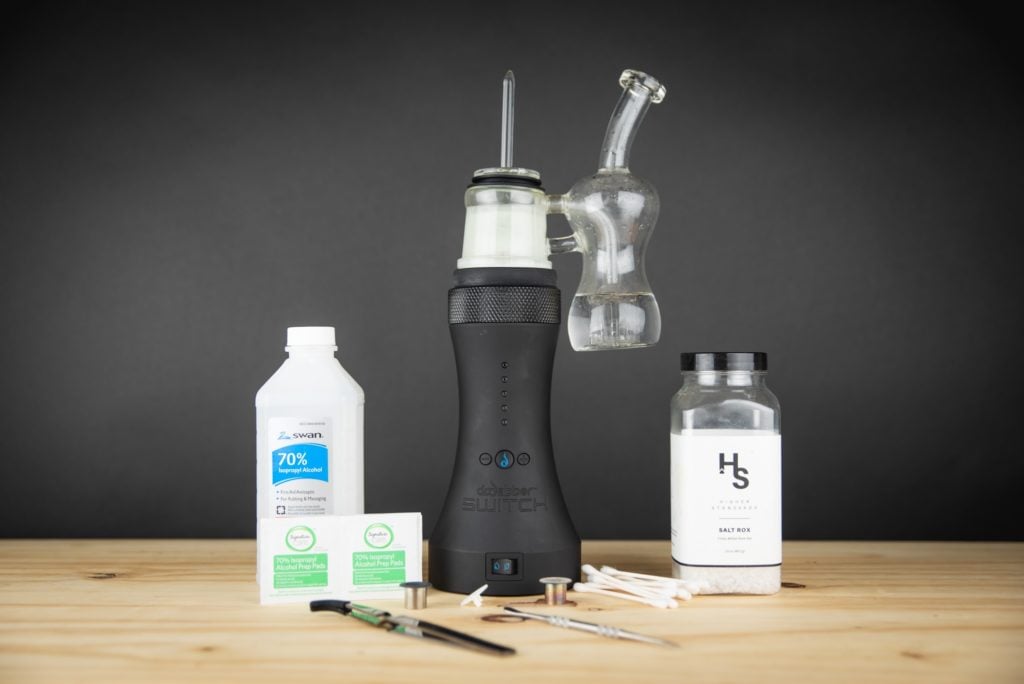
Normally I am not a huge fan of portable dab rigs because of the cleaning that goes along with the process, but that is NOT the case with the Dr Dabber Switch.
Cleaning Frequency: The Switch comes with a cleaning mode that will ultra-heat the induction cups to clean off any remaining residue or concentrates. You can go quite a long time without having to clean the induction cups, but I recommend running the cleaning cycle every ten dabs or so. This will maintain your cups for longer and ensure you get the best taste possible.
Switch Auto Cleaning Cycle: Place your induction cup into the chamber, set the preference to OIL, and then set the temp to max temp. Once is there, hold down the temp-up button for a couple of seconds until the LED’s on the front start blinking red.
DO NOT INHALE AT THIS TEMP, and make sure to let the induction cup completely cool down before removing it from the chamber. It will be extremely hot.
Cleaning the Glass: The only thing you will need to clean by hand is the chamber in the top and the percolator/bubbler that the Switch comes with.
I recommend picking up some Isopropyl Alcohol (90% or greater), salt, and some q-tips for the bubbler and the top chamber. I have also found that microwaving your ISO for about 10 seconds before throwing it into the bubbler helps get out the residue in tight spaces.
You will notice it’s time to clean the glass when the draw resistance starts to increase.
You can also drop the induction cups in some ISO and let them sit for a bit to fully remove any remaining residue after the cleaning cycles. Again, make sure everything has completely cooled down.
Overall, cleaning is a straightforward and simple process. This is one of my favorite features about the Switch and why I use it more than any of my other portable dab rigs.
Switch Dab Rig Warranty Info
The DR DABBER Switch comes with a two-year limited warranty on electronic components and the battery pack. A two-year warranty on the battery is insane, most people don’t warranty batteries at all.
Make The Switch. You Won’t Be Disappointed
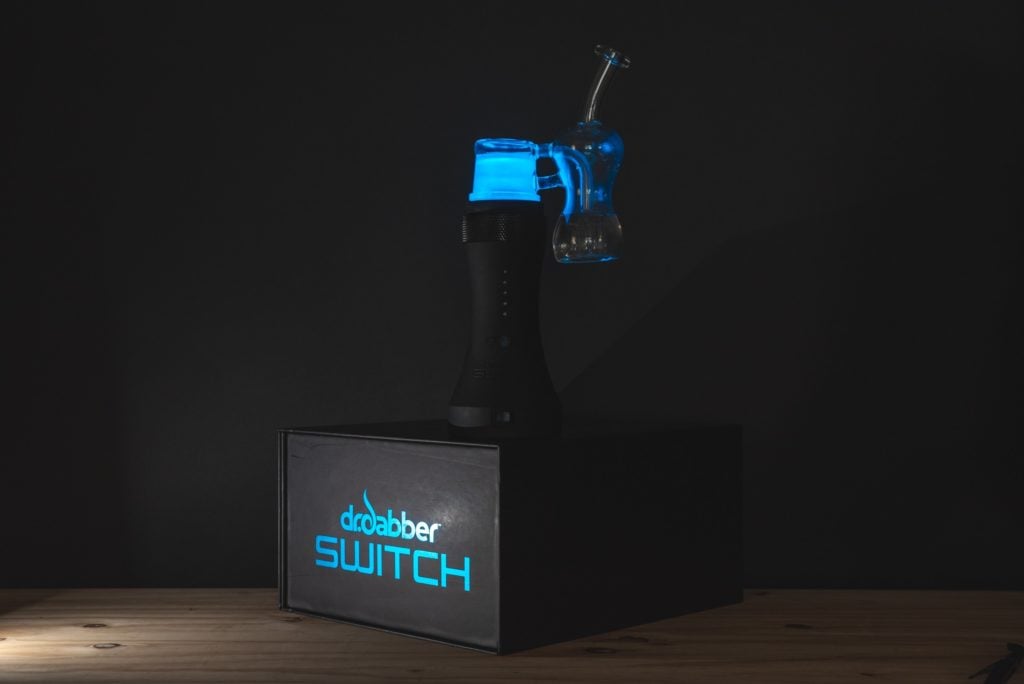
Is the Dr. Dabber Switch worth it? If you’ll be using it strictly for concentrates, yes. I hate to start off the Switch review summary with a negative, but I don’t want anyone to buy the Dr. Dabber Switch thinking that it’s the best of both worlds because it’s not. It’s exceptional at vaping concentrates and oils, but I would NOT buy the Switch for flower.
With that said, the Switch is the only dab rig that I use at home now. It heats up extremely fast, it’s easy to clean and maintain, easy to load materials, and everything just works. It sits in my office when I’m working, it’s on the coffee table in the living room when I’m watching shows, and if I want to bring it over to a friend’s house, it all packs up nicely back into the box it came in.
I’ve been working on putting together a “best dab rig” article, and this is the 7th portable dab rig that I’ve tested. I can honestly say that the Dr. Dabber Switch is my most used dab rig other than the RIO dab rig by Stache Products, and that’s only because I take the RIO with me on the go. The Rio is a portable dab rig, whereas the Switch is a stationary at-home use dab rig.
The Dr. Dabber Switch retails for $374.95, and you can click here to check out the Dr. Dabber Switch directly from Dr. Dabber. Save an extra 15% with coupon code VAPEWIZ15. Remove free items from the cart for the discount. The code doesn’t work if the item has already been discounted.
Let me know if you have any questions about the Dr. Dabber Switch by leaving a comment below or hit me on my contact page. Thanks for checking out my Dr. Dabber Switch review, and have a great day!
